Why DIY Fashion Is More Than a Trend

DIY fashion isn’t just about altering your clothes — it’s a mindset. It empowers you to take full control of your personal style, reduce fashion waste, and save money while expressing your creativity. From upcycling old garments to transforming graphic tees into custom fashion statements, DIY fashion is all about making something that reflects your individuality. Best of all, it’s a fun, hands-on hobby you can enjoy from the comfort of your home using just a few simple tools.
The Perks of DIY Clothing Projects
Let’s be real—there’s something special about wearing clothes you made or redesigned yourself. Here’s why people are falling in love with DIY fashion:
- It’s budget-friendly. You can revamp old clothes for next to nothing.
- It’s sustainable. Less shopping means less textile waste.
- It’s unique. No one else will have what you’re wearing.
- It’s empowering. You’re the designer, tailor, and stylist all in one.
What You’ll Need to Get Started
Starting your own DIY fashion journey doesn’t mean you need a sewing machine or professional equipment. Here’s a basic list of tools and materials to get going:
- Sharp fabric scissors
- Measuring tape or ruler
- Fabric glue or sewing kit
- Iron and ironing board
- Fabric paint, dye, or markers
- Old clothing (T-shirts, button-ups, etc.)
You don’t need to buy everything at once. Many projects require just scissors, glue, and a little creativity.
T-Shirt Transformations
Let’s face it—everyone has at least one plain T-shirt lying around. Instead of letting it collect dust, give it new life.
Crop It
One of the easiest ways to transform a shirt is to crop it. Mark where you want the cut to go and use fabric scissors for a clean finish. You can even cut it at an angle or turn it into a tie-front crop top.
Cut-Out Designs
Add flair by cutting slits or shapes into the back, sides, or shoulders. A simple ladder cut down the back or triangle cut-outs on the sides can completely change the vibe of a shirt.
Add Some Paint
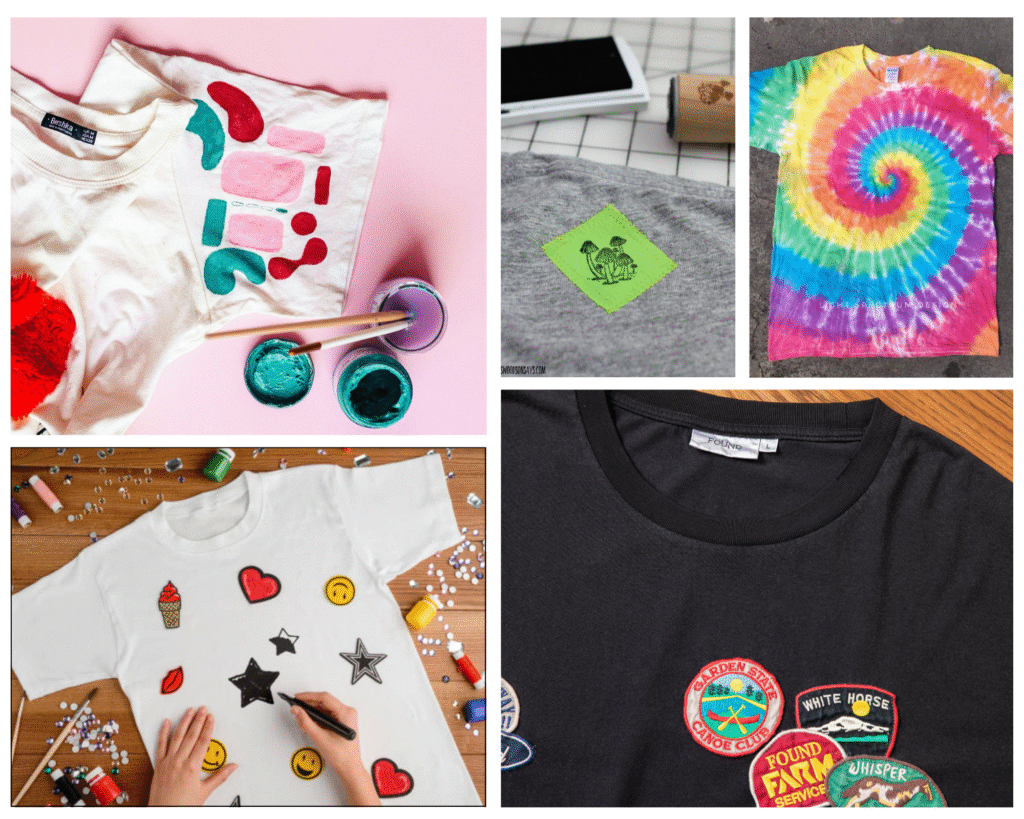
Use fabric paint to draw or stencil on designs. Words, symbols, or abstract shapes all work well. Don’t worry about perfection—imperfections often make DIY pieces more charming.
Tie-Dye Tactics
Tie-dye is back and easier than ever. All you need is some fabric dye, rubber bands, and a shirt.
Popular Tie-Dye Styles
- Spiral: Twist the shirt and apply different dye colors.
- Crumple: Scrunch the shirt and dab colors randomly.
- Stripe: Fold the shirt into pleats and dye in sections.
Let your shirt dry for at least 6–8 hours, then rinse with cold water. The results are always unique.
Revamping Button-Ups
Don’t sleep on old button-up shirts—they’re perfect for creative DIYs.
Oversized Chic
Wear an oversized shirt as a dress or tie it at the waist for a relaxed look. Rolling up the sleeves or cutting off the collar can give it new style.
Add Trim or Lace
Sew or glue lace to the bottom hem or around the sleeves for a softer, vintage-inspired feel. It’s a simple way to add elegance without changing the whole structure of the shirt.
Patch It Up
Use fabric patches to cover stains or holes, or just to decorate. Patches can be sewn or glued on, and they instantly add a personalized touch.
No-Sew DIY Projects
Not handy with a needle and thread? No worries. There are tons of no-sew options out there.
Tied Halter Tops
Cut off the bottom half of an old shirt, then slice the top to create long straps you can tie behind your neck. Boom—instant halter top, no sewing required.
Fringe Tees
Cut vertical strips along the hem of your shirt and knot the pieces for a fringed effect. This works great for casual summer styles.
Fabric Glue Magic
You can use fabric glue to hem edges, attach trims, or even “sew” pieces together. It’s strong, washable, and beginner-friendly.
Personalize with Prints
You don’t need artistic skills to make a statement. Here are easy ways to personalize with prints.
Use Stencils
Cut shapes out of cardboard or freezer paper and use them as stencils for fabric paint. Tape them to your shirt, dab on the paint, and peel off for a clean result.
Stamp It
Use household items like sponges, corks, or even leaves dipped in paint to create prints. This technique is great for abstract or repeated patterns.
Iron-On Transfers
Print your own design onto transfer paper and iron it onto your shirt. Just make sure you follow the instructions carefully to make it last through the wash.
Layering and Styling Your DIY Creations
Once you’ve made a few DIY pieces, it’s time to show them off. The key to wearing your creations is confidence—and good layering.
Pair With Basics
Let your handmade shirt shine by pairing it with simple jeans, leggings, or shorts. Keep the rest of your outfit neutral to avoid clashing.
Add Accessories
Layer on some necklaces or a bold belt to complement your outfit. Accessories can elevate even the most basic T-shirt.
Wear It Your Way
There’s no rulebook. Tuck it in, knot it, roll the sleeves—do whatever feels like you. DIY fashion is about breaking the mold, not following it.
Common Mistakes to Avoid
Even the best DIYers mess up sometimes. Here are some common mistakes you can avoid:
- Cutting too much, too fast: Always measure and mark before you cut.
- Skipping pre-wash: New shirts often shrink after washing—pre-wash to avoid sizing surprises.
- Using the wrong paint or glue: Make sure your materials are fabric-safe and washable.
- Not heat-setting paint: If you don’t heat-set your painted designs, they’ll fade fast in the wash.
Mistakes are part of the learning process. Embrace them and keep going.
Upcycling: The Future of Fashion
Upcycling isn’t just trendy—it’s a sustainable way to create fashion. Instead of tossing out old clothes, turn them into something better. This practice reduces waste, saves money, and gives you complete creative control.
Ideas for Upcycling Projects
- Turn old jeans into vests or bags
- Cut a dress into a top and skirt set
- Make wristbands or scrunchies from fabric scraps
The possibilities are endless when you look at your closet with a creative eye.
Final Thoughts: Your Style, Your Rules
DIY fashion isn’t about perfect stitches or designer-level prints. It’s about having fun, expressing yourself, and stepping outside the box. Whether you’re turning a T-shirt into a tank or reviving an old button-up, what you wear becomes an extension of who you are. So grab those scissors, break out the paint, and start making your own rules—one outfit at a time.
FAQs
Q1: What’s the easiest DIY fashion project for beginners?
Start with a no-sew crop top or tie-dye shirt. Both are quick, easy, and don’t require advanced tools or skills.
Q2: How can I make my designs last longer?
Always heat-set painted designs with an iron and wash inside out with cold water. Use fabric-safe paints and glues for durability.
Q3: Can I do DIY fashion without sewing at all?
Absolutely! Many stylish projects use fabric glue, cutting, or tying methods. No sewing required.
Q4: What fabric works best for beginners?
Cotton is the easiest to work with. It absorbs dye well, holds paint, and is easy to cut and glue.
Q5: Where can I find inspiration for my DIY projects?
Pinterest, YouTube, and street fashion photos are great places to start. Try searching for “DIY T-shirt ideas” or “no-sew fashion hacks.”

